Importing Accounting Data from Telaris ERP to Uni Micro V3
This guide describes how accounting data is exported from Telaris ERP and imported into Uni Micro V3 using UNI Standard format.
TABLE OF CONTENTS
- Importing Accounting Data from Telaris ERP to Uni Micro V3
- Prerequisites
- Step 1 – Create and Download a Batch in Telaris ERP
- Step 2 – Open the Import in Uni Micro V3
- Step 3 – What Is Imported
- Step 4 – Verification
- Step 5 – Mark as Sent in Telaris
- Would You Like This Integration?
Prerequisites
- Access to Telaris ERP and Uni Micro V3.
- The accounts are fully set up in Uni Micro (chart of accounts, VAT codes, etc.).
- The accounting period to be exported is ready.
Step 1 – Create and Download a Batch in Telaris ERP
Go to:
the hamburger menu → Finance → Batches for export
Click Close batch. Each time this is done, a new batch is created within the current month.
Then download the batch as a TXT file in UNI Standard format and save the file locally on your computer.
NOTE: If you click "Close batch" several times in the same month, multiple batches are created.
This can lead to double import if the same batch is imported more than once in Uni Micro.
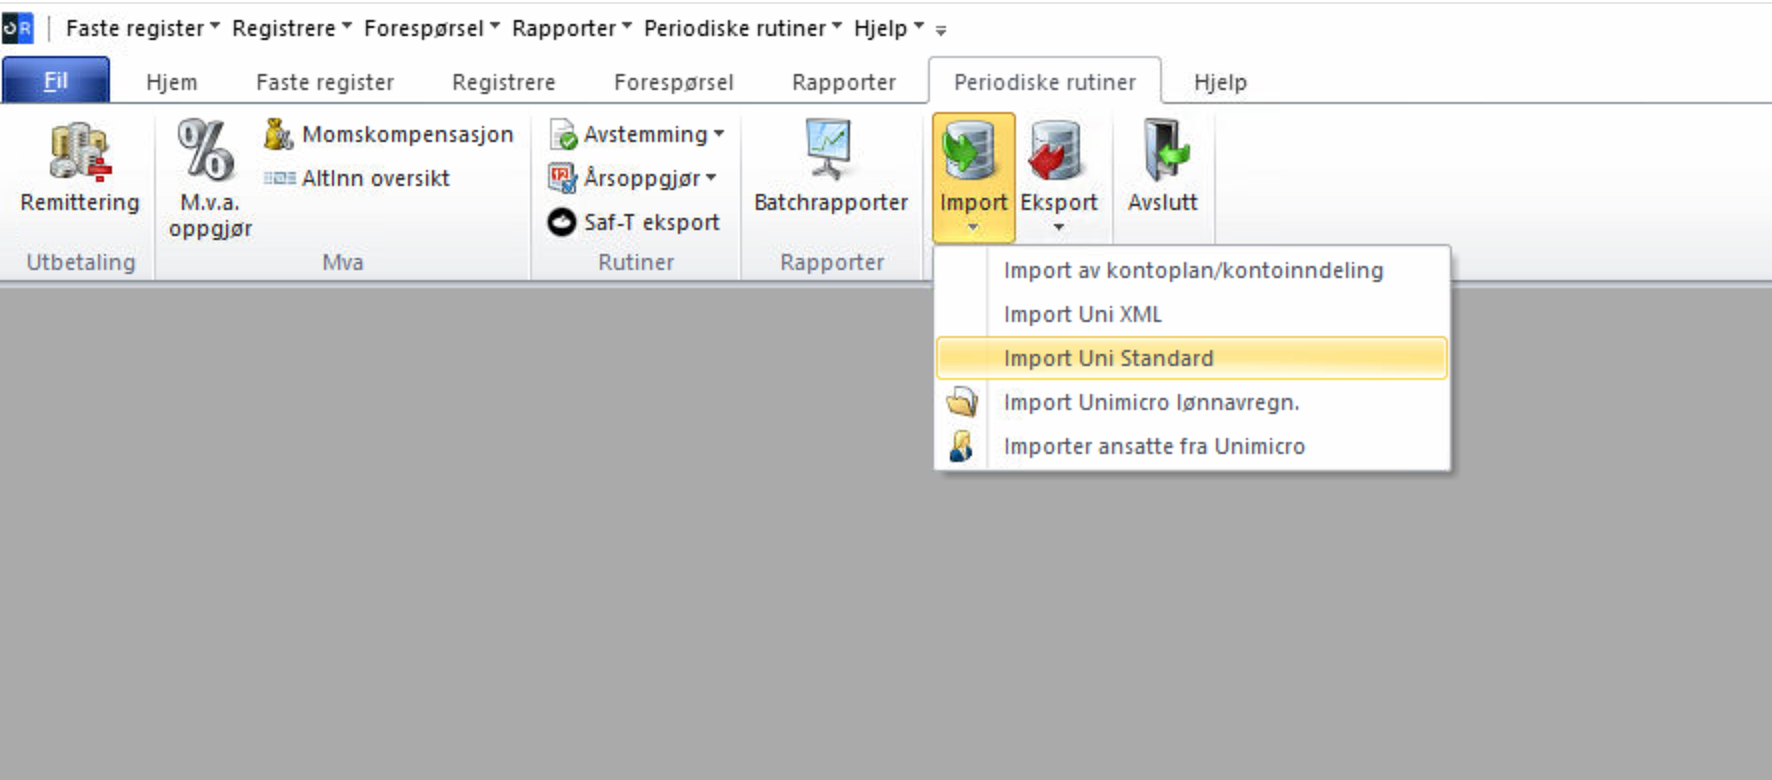
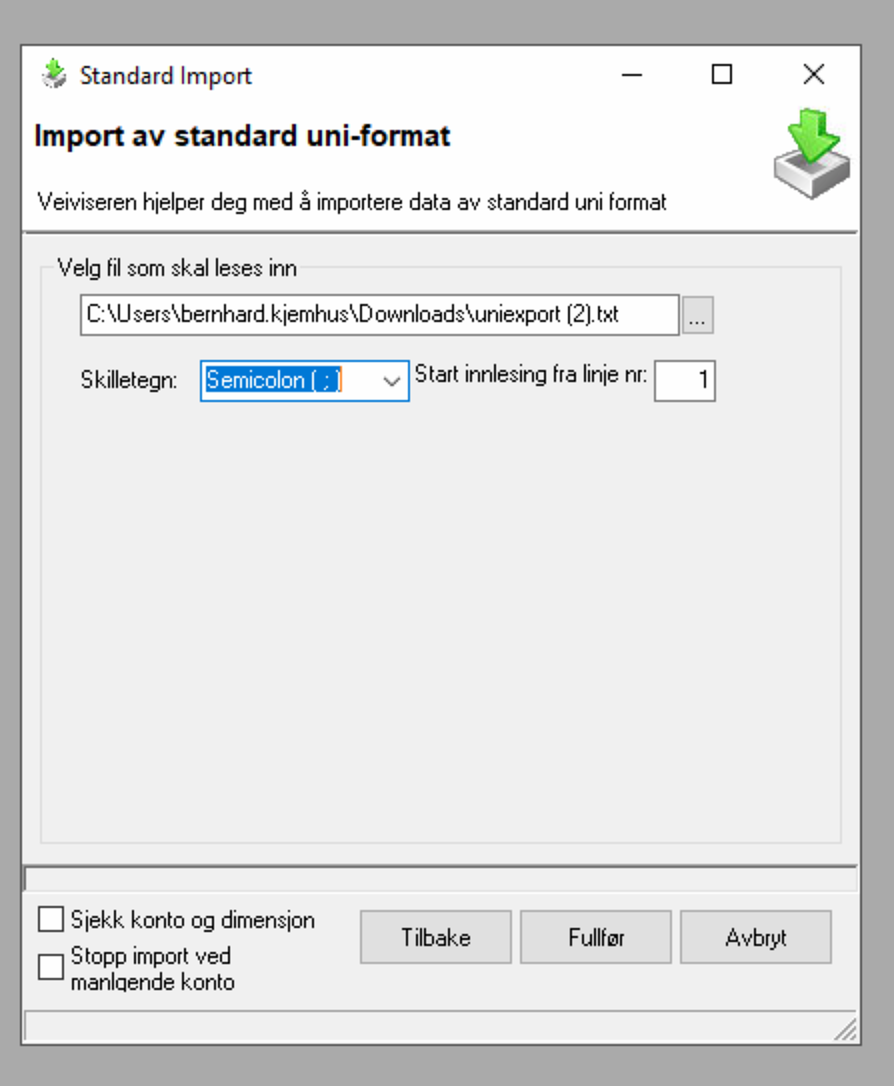
Step 2 – Open the Import in Uni Micro V3
In Uni Micro V3, do the following:
- Select the Accounting module.
- Go to Periodic routines → Import → Import Uni Standard.
- Select the batch file (TXT) you downloaded from Telaris.
See the screenshots below for details on reading in the file.
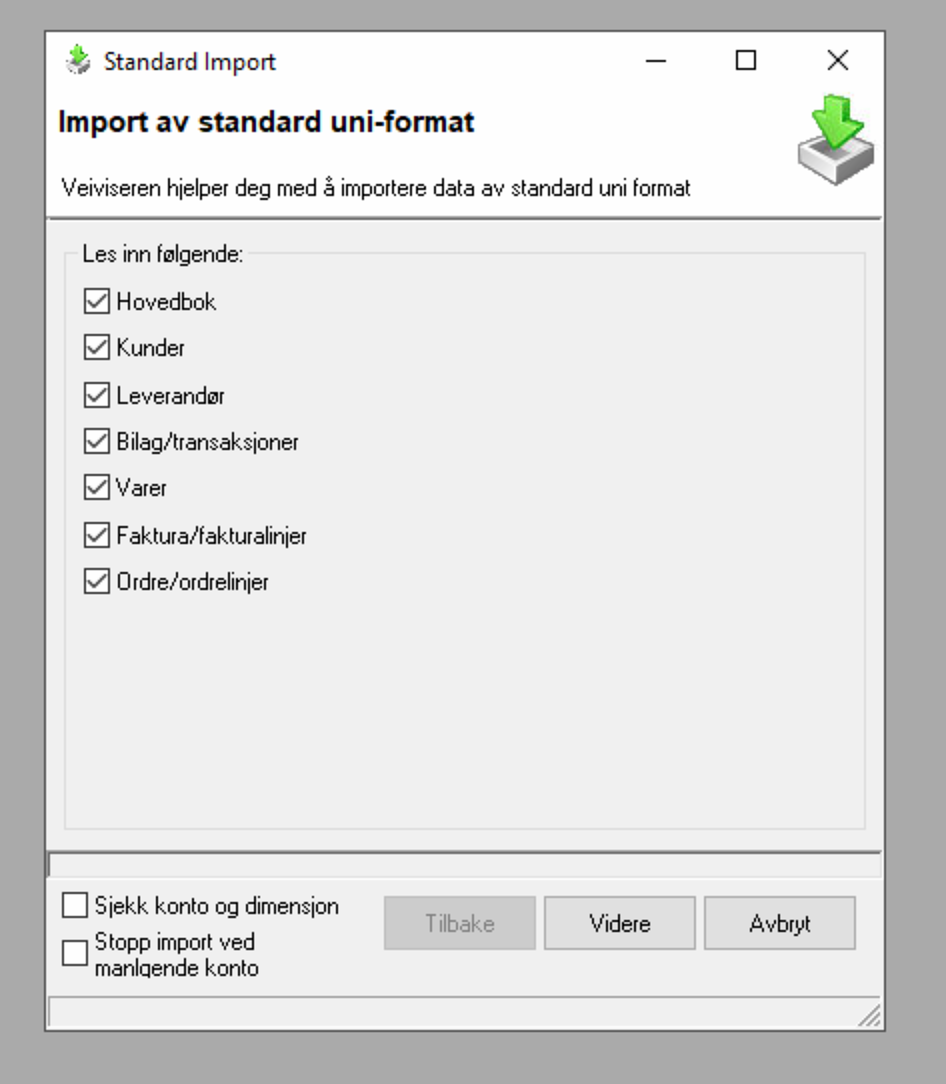
Step 3 – What Is Imported
The following data can be imported from Telaris ERP to Uni Micro V3:
- Customers
- Invoice journal
- Payment vouchers
- Cost vouchers
- Any cash settlements from Duell
The invoice journal automatically creates invoice headers with customer, account and amount in the Uni Micro invoice module, so that the ledger can be followed up further in Uni Micro.
All accounting data is imported as voucher type 60.
NOTE: The invoice number from Telaris becomes the voucher number in Uni Micro.
It is therefore important to set up a separate number series in Uni Micro
that does not collide with other vouchers, invoices or payments.
Step 4 – Verification
After import, the vouchers should be checked in the general ledger in Uni Micro.
Step 5 – Mark as Sent in Telaris
Once the batch has been checked and approved in Uni Micro, it should be marked as sent in Telaris ERP.
This ensures that the same batch is not exported and imported again.
Would You Like This Integration?
Import and follow-up of accounting data to Uni Micro V3 is provided as a service by Telaris.
Contact us if you would like to get started, or have questions about setup, use or further customisation.
Was this article helpful?
That’s Great!
Thank you for your feedback
Sorry! We couldn't be helpful
Thank you for your feedback
Feedback sent
We appreciate your effort and will try to fix the article