Setting up time types
How to create and configure time types so that employees record hours on the right category and the hours are invoiced and posted correctly.
TABLE OF CONTENTS
Open the time type setup
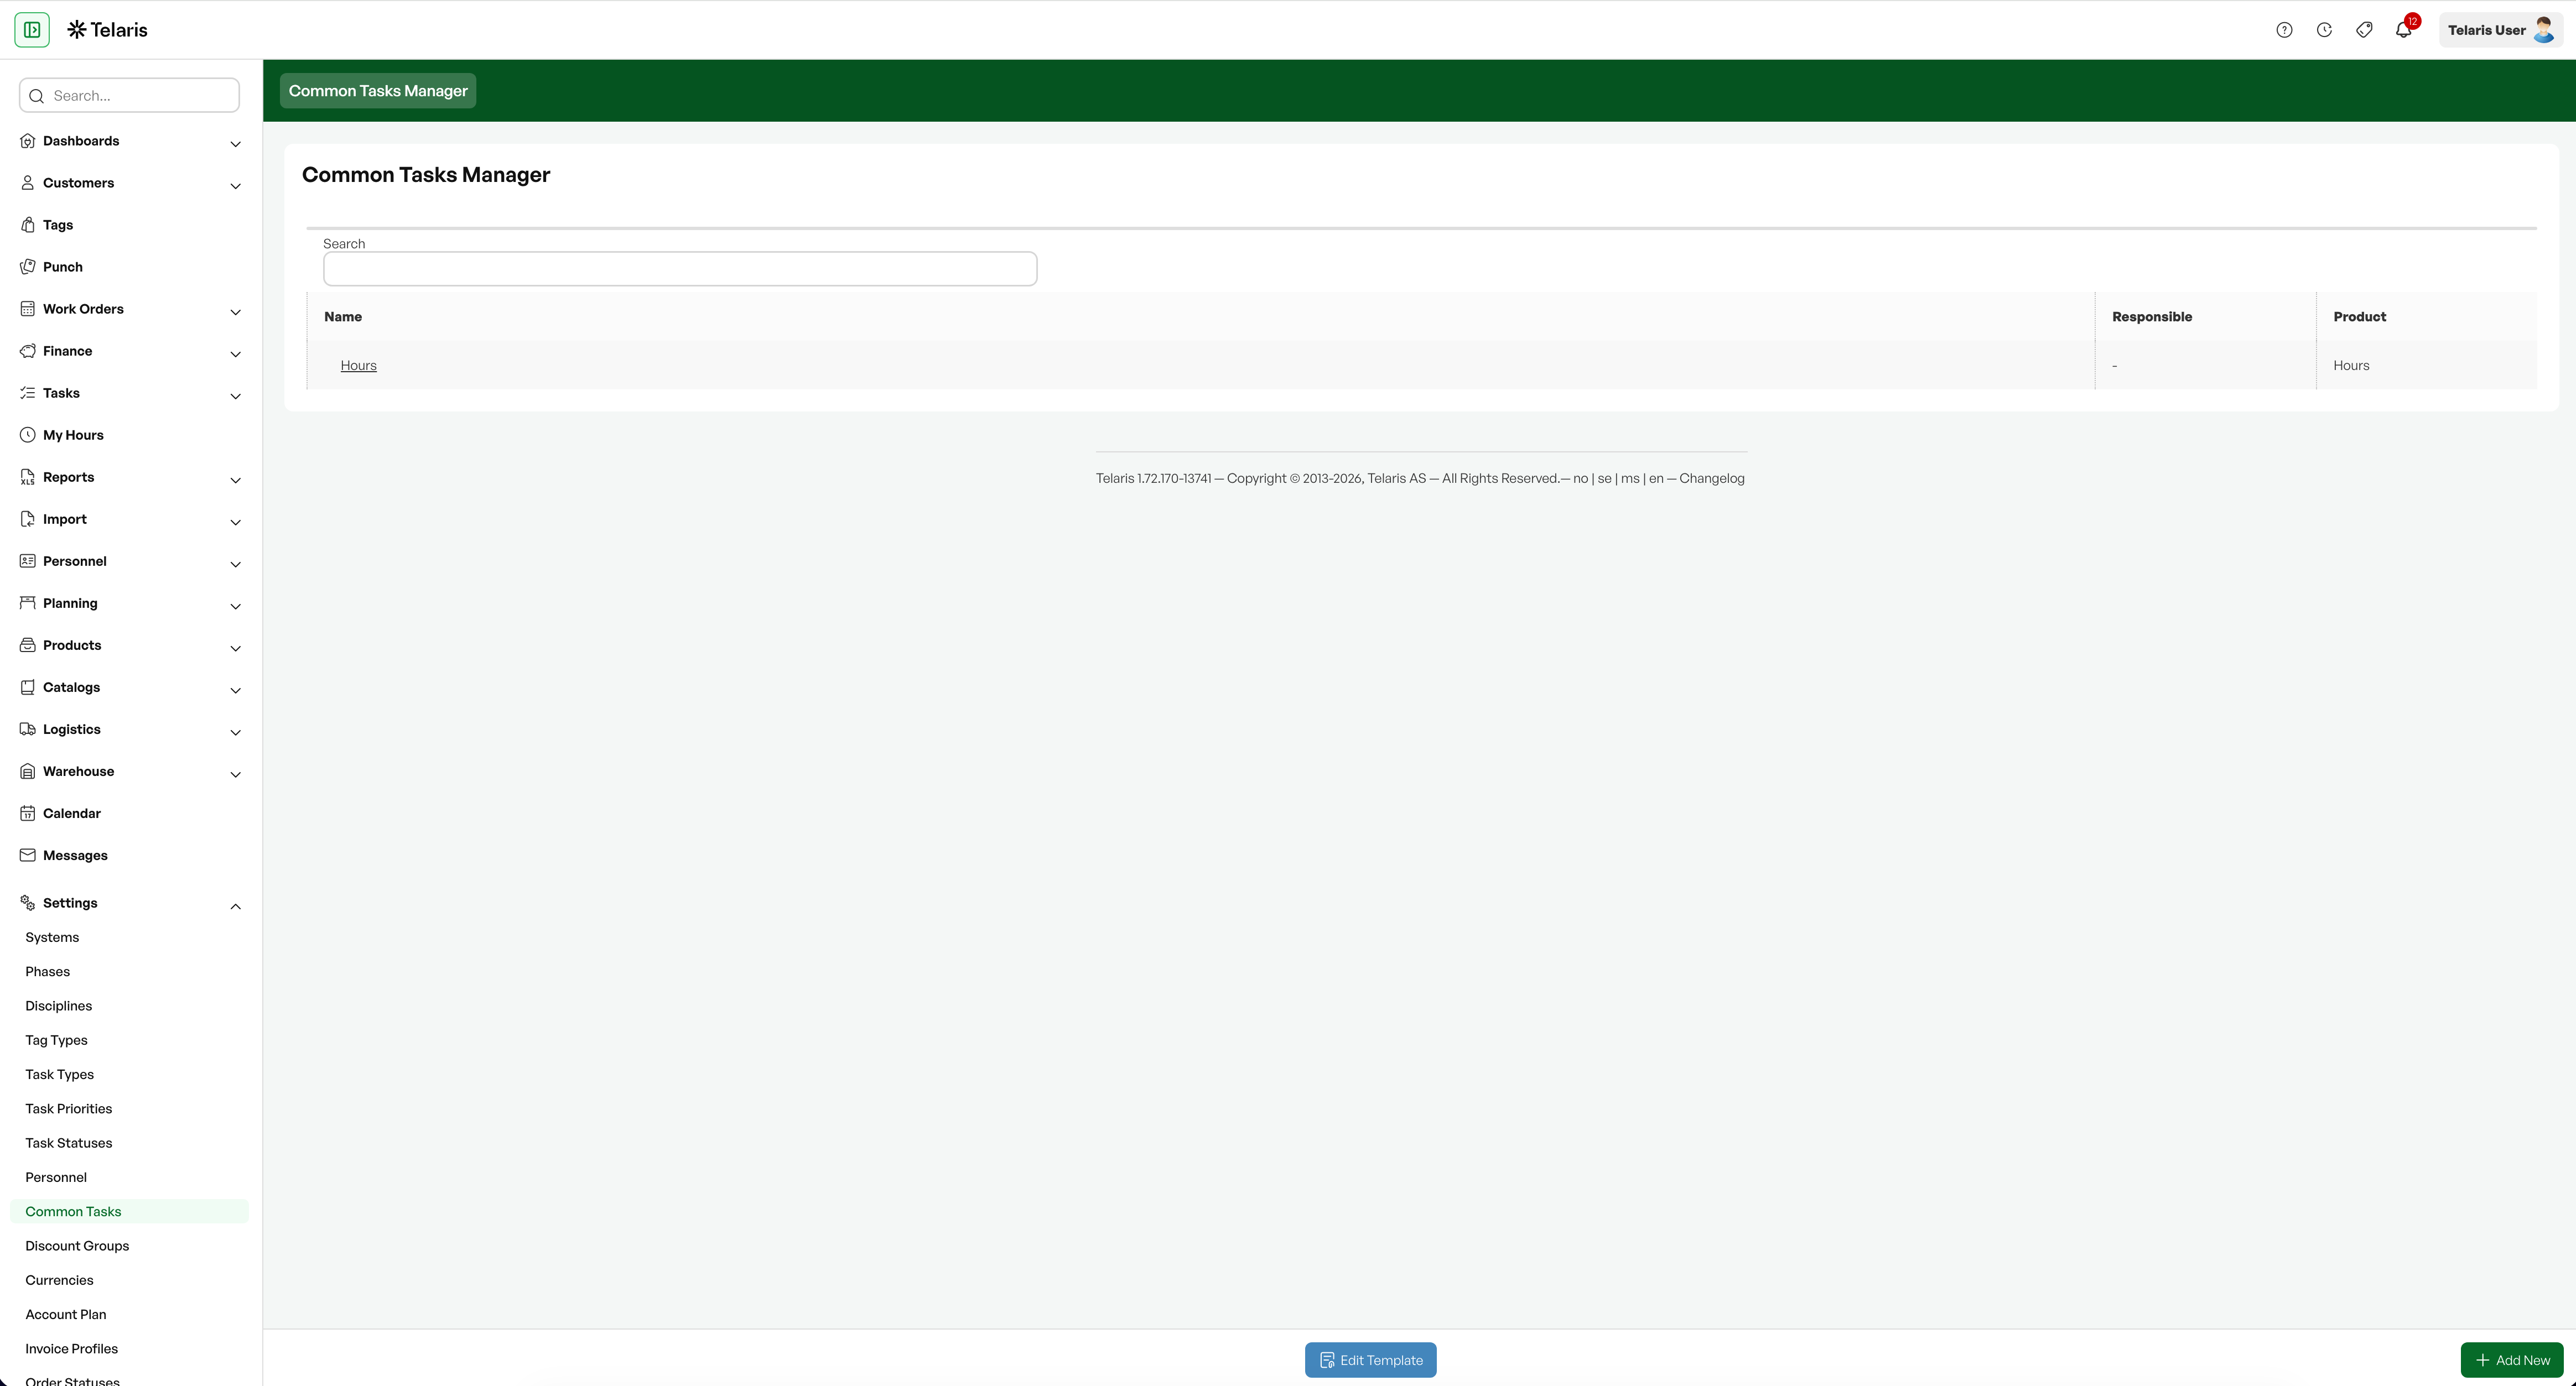
Go to Administration and open Tasks. The Common Tasks Manager overview shows the time types that already exist. Click a name to edit an existing time type, or choose Add New to create a new one.
In the system this area is labelled Common Tasks.
Create the task
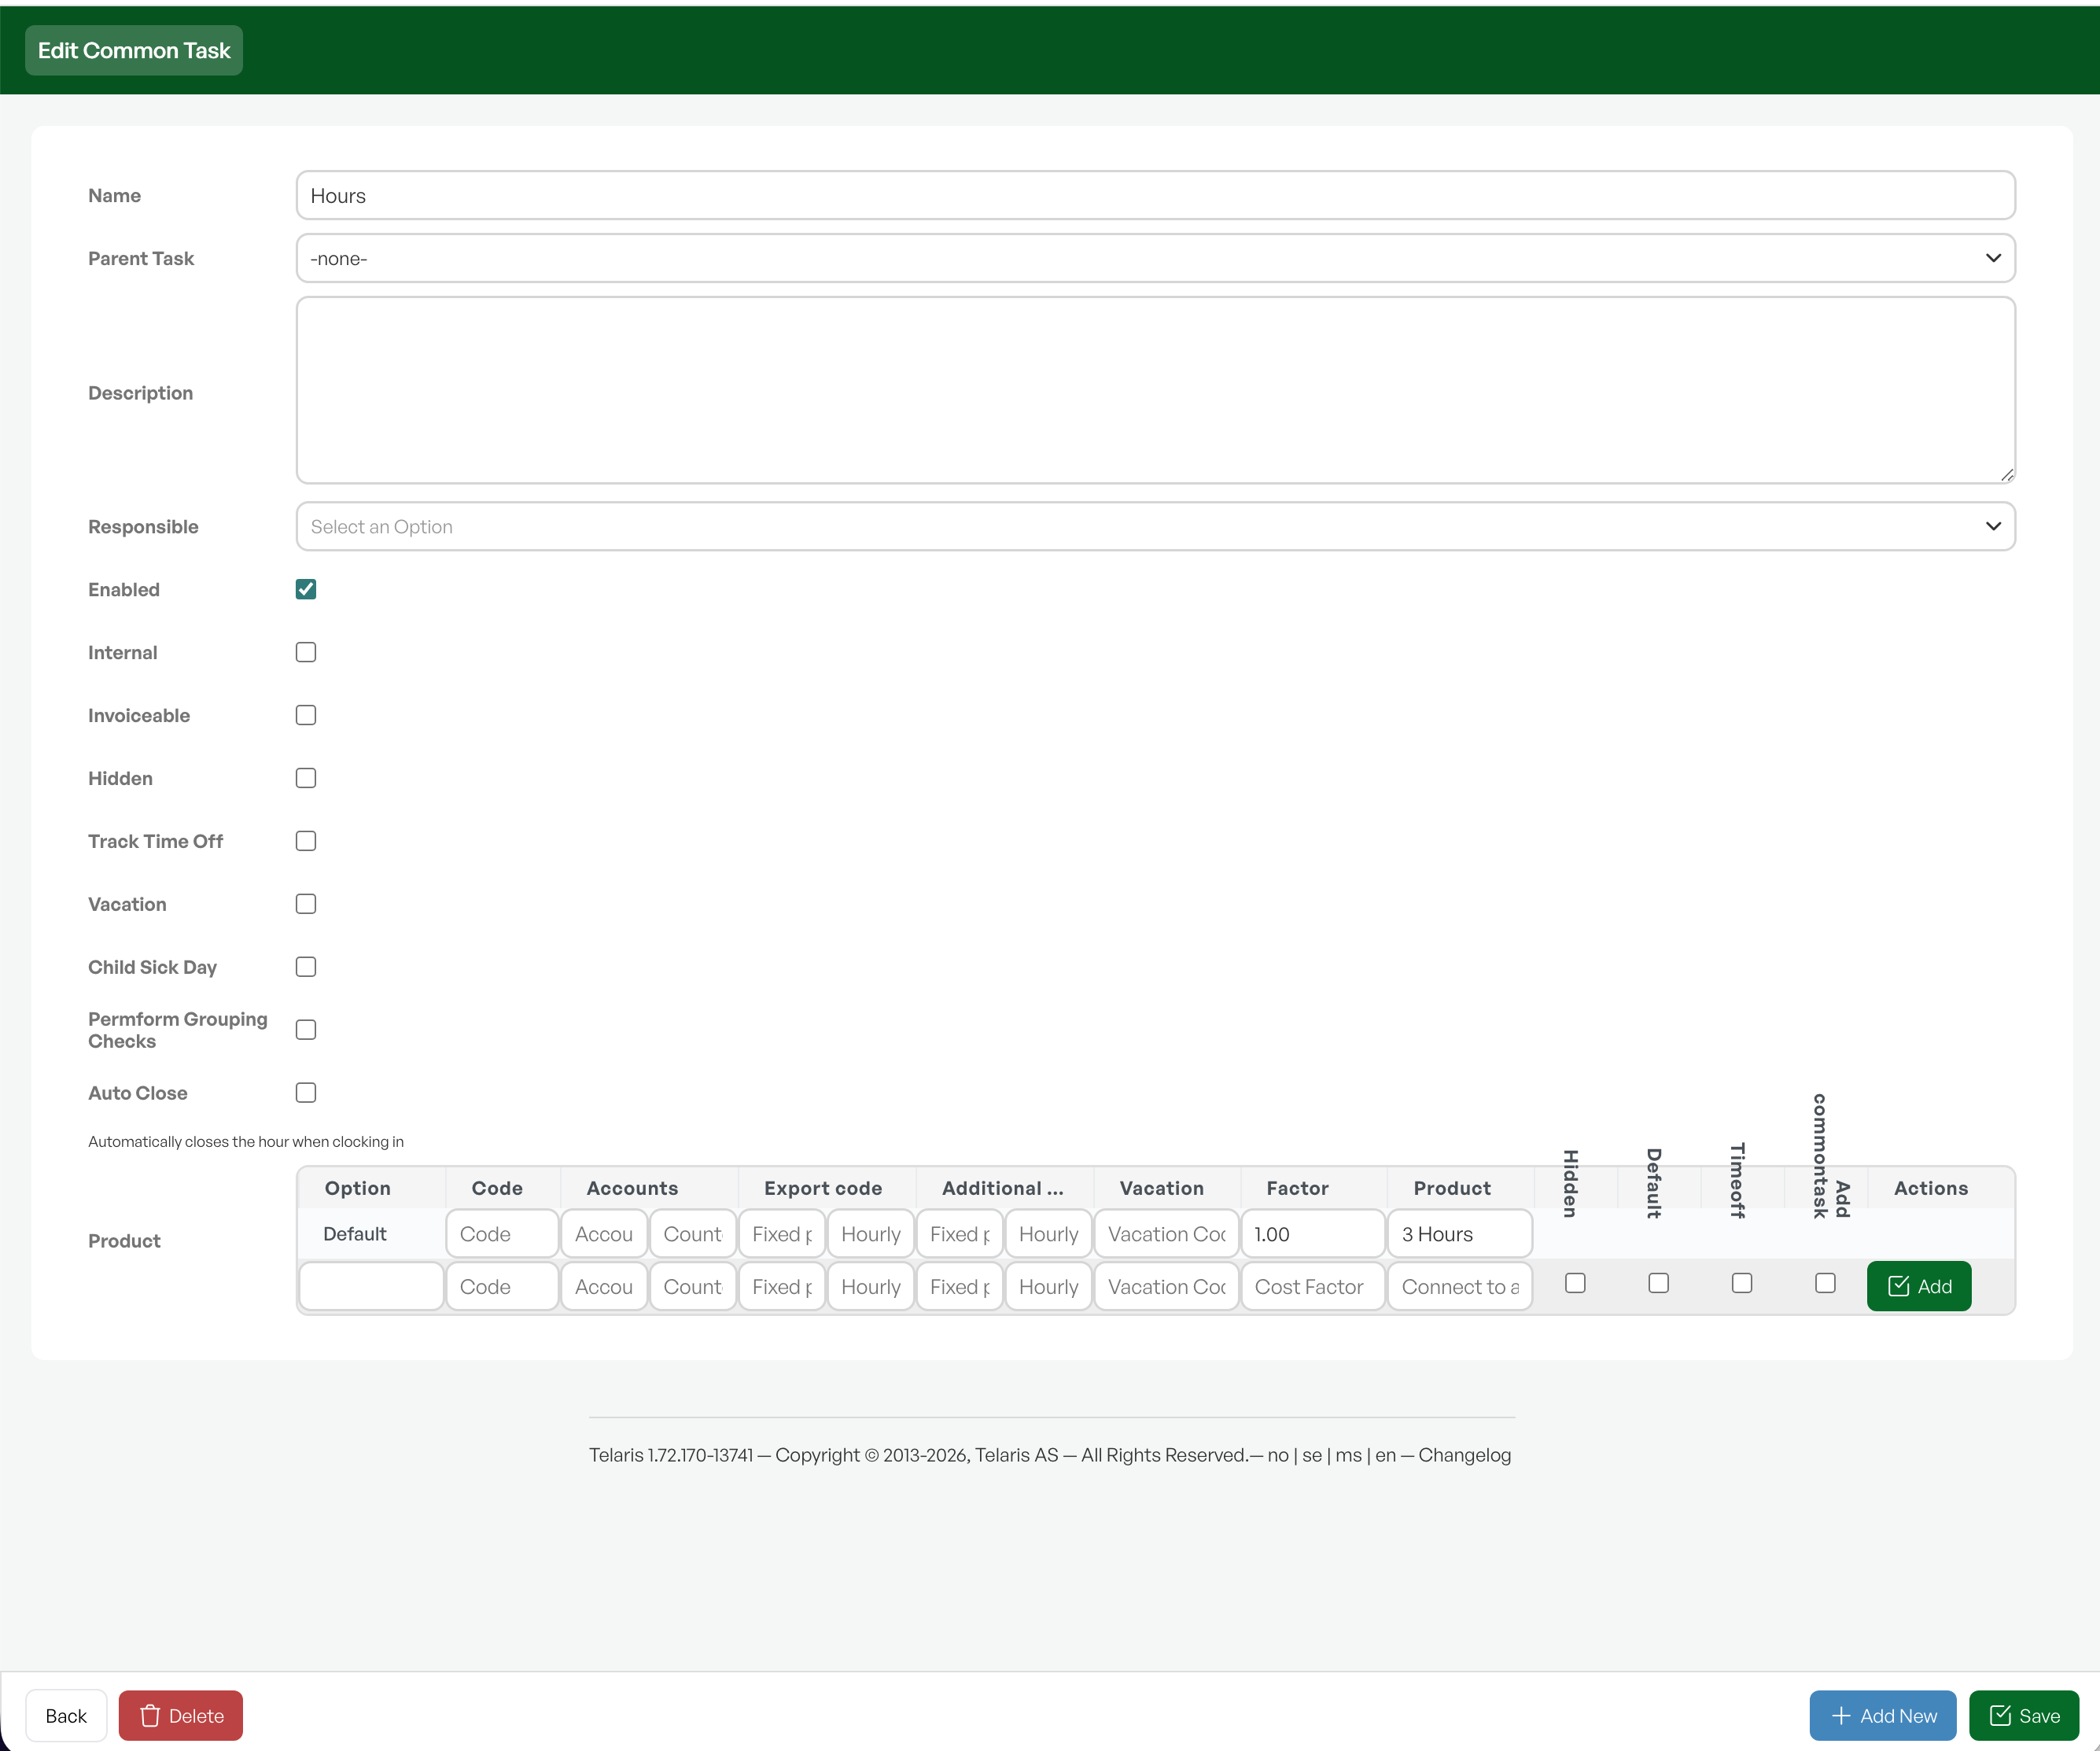
A time type consists of a task, which is the main category for the work (for example Assembly, Travel or Internal), and options below it, which are subtypes (for example Normal or Overtime). Start with the task.
Give the task a clear name, since this is what employees see when recording hours. Then tick how it should behave. The most important choices are whether the hours are Internal, meaning internal work that is not invoiced, or Invoiceable, and whether the task should be active (Enabled) and visible to employees. Separate checkboxes mark absence such as Vacation or Child Sick Day, and Auto Close closes the hour automatically on clock-in.
Link to account and product

For the hours to be posted and invoiced correctly, fill in the account and cost factor on the task and link it to a product. The product determines the invoice line and price, and controls posting and VAT through its product class.
Which accounts, codes and product are correct depends on your accounting and payroll setup. If you are unsure, check with accounting or your system administrator.
Add options

At the bottom you add the options, which are the subtypes of the task. Add one row per subtype, for example Normal and Overtime, and give each row a name. Mark the most common subtype as Default so that it is preselected for employees.
An option can have its own codes and product, just like the task. Click Add to save the row, and repeat for each subtype you need.
Save
Click Save. The task now appears in the overview, and as long as it is active, employees can choose it when recording hours.
Tip: Start with the task and the product link, and add the options last. Which accounts and product to use depends on your setup.
Was this article helpful?
That’s Great!
Thank you for your feedback
Sorry! We couldn't be helpful
Thank you for your feedback
Feedback sent
We appreciate your effort and will try to fix the article